
Tips for Machining Gummy Materials
Machinists face many problems and challenges when manufacturing gummy materials. These types of materials include low carbon steels, stainless steels, nickel alloys, titanium, copper, and metals with high chromium content. Gummy materials have a tendency to produce long, stringy chips, and are prone to creating built-up edge. These common problems can impact surface finish, tool life, and part tolerances.
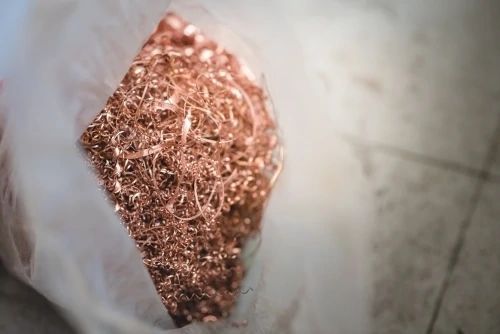
Continuous Chip With a Built-Up Edge
Continuous chips are long, ribbon-like chips that are formed when the tool cuts through a material, separating chips along the shear plane created by the tool’s cutting edge. These chips slide up the tool face at a constant flow to create a long and stringy chip. The high temperatures, pressures, and friction produced when cutting are all factors that lead to the sticky chips that adhere to the cutting edge. When this built up edge becomes large enough, it can break off leaving behind some excess material on the workpiece, or gouge the workpiece leaving a poor surface finish.
Coolant
Using large amounts of coolant can help with temperature control and chip evacuation while machining gummy materials. Temperature is a big driving force behind built-up edge. The higher the temperature gets, the easier and faster a built-up edge can form. Coolant will keep local temperatures lower and can prevent the material from work hardening and galling. Long, stringy chips have the potential to “nest” around the tool and cause tool failure. Coolant will help break these chips into smaller pieces and move them away from the cutting action by flash cooling them, resulting in fracturing of the chip into smaller pieces. Coolant should be applied directly to the contact area of the tool and workpiece to have the maximum effect.
Tool Engagement
Running Parameters
The tool should be constantly fed into the workpiece. Allowing the tool to dwell can cause work hardening and increase the chance of galling and built up edge. A combination of higher feed rates and lower speeds should also be used to keep material removal rates at a reasonable level. An increase in feed rates will raise the temperature less than an increase in speed. This relates to chip thinning and the ability of a tool to cut the material rather than rub against it.
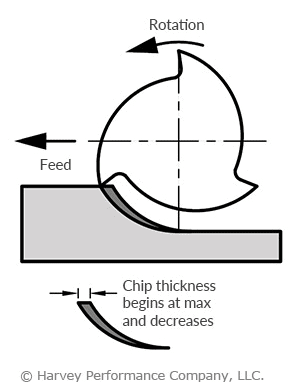
Climb Milling
Climb milling is the preferred method as it directs more heat into the chip than the tool. Using climb milling, the largest chip cross section is created first, allowing the tool to cut through the material much easier. The heat generated from friction when the tool penetrates the workpiece is transferred to the chip rather than the tool because the thickest part of the chip is able to hold more heat than the thinnest.
Initial Workpiece Engagement
Sudden, large changes in force, like when a tool initially engages a workpiece, have a negative impact on tool life. Using an arc-in tool path to initially engage the material allows for increased stability with a gradual increase in cutting forces and heat. A gradual tool entry such as this is always the preferred method over an abrupt straight entry.
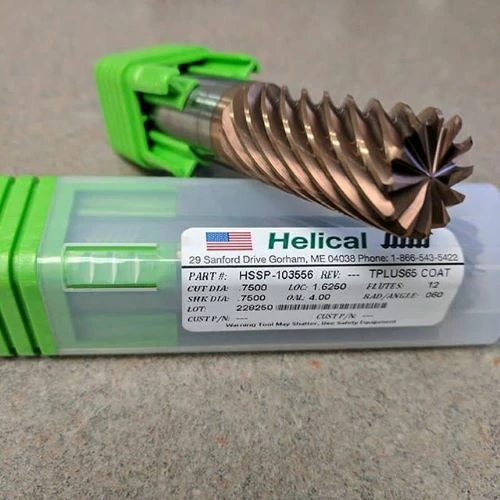
Tool Selection
A tool with a sharp and robust cutting edge should be selected to machine gummy materials. Helical has tooling specifically designed for Titanium and Stainless Steel to make your tool selection process easy.
Additionally, choosing a tool with the correct coating for the material you are machining will help to protect the cutting edge and result in a far lower chance of built up edge or galling than an uncoated tool. A tool with a higher flute count can spread tool wear out over multiple cutting edges, extending tool life. Tool wear is not always linear in gummy materials; as soon as a little bit of wear appears, tool failure will happen relatively quickly. Changing the tool at the first sign of wear may be necessary to ensure that parts are not scrapped.
Gummy Materials Summarized
Every material machines somewhat differently, but understanding what is happening when the tool cuts the workpiece and how this affects tool life and finish will go a long way to successfully completing any job. Built-up edge and excess heat can be minimized by selecting the correct tool and coating for the material, and following the tips and techniques mentioned above. Finally, be sure to check your machine’s runout and ensure maximum rigidity prior to beginning your machining operation.


Is there anything else that can be done to combat chip wrap (nesting) while drilling gummy materials?
Hi Colin,
Have you tried using a pecking cycle? If you are still experiencing nesting after that, give us a call at 800-645-5609 and we can try to diagnose the issue with you over the phone.
I use G73 peck cycle seems to help.
Merry Christmas Colin,
Run your tool like it was a groove tool; give it a dwell to break the chip n keep moving. I have developed macros for this and it has worked really well for 304 and 316……
Here’s some research that may help….
Purdue University engineers discovered that everyday permanent markers, glue sticks and packing tape may offer a surprisingly low-tech solution to a long-standing nuisance in the manufacturing industry: Making soft and ductile, or so-called “gummy” metals easier to cut.
What makes inks and adhesives effective isn’t their chemical content, but their stickiness to the surface of any gummy metal such as nickel, aluminum, stainless steels or copper. Full Story: http://bit.ly/gummy-metals
Nice article! Thank you for sharing some helpful tips for machining gummy materials.
Thanks for sharing the tips and techniques to overcome the problems and challenges when manufacturing gummy materials.
HI EVERYONE!
IM DEALING WITH THIS GUMMY MATERIAL CALLED “KIRKSITE”. BUT TRYING TO FIND THE RIGHT FEES AND SPEEDS HAS BEEN A PAIN.
IM TRYING TO FACEMILL A DEPTH OF ABOUT .200″, BUT IM USING A 3/4 ENDMILL WITH 3FLUTES CARBIDE (THE BUDGET IS VERY LIMITED ABOUT TOOLING, SO I HAVE TO STICK TO THIS TOOL).
ANY SUGGESTION FOR FEEDS AND SPEEDS WILL BE VERY APPRECIATED.
Hello Ivan,
Thank you for the request. Please send your application information to [email protected] and they will be able to help you hone in your speeds and feeds.
Very interesting and useful article. Sidenote: why does your climb cutting graphic apparently show from below? A normal cut has a clockwise rotation as viewed by the machinist…confusing to visualize, just saying..