Tag Archive for: Cutting Tools

Octane Workholding – Featured Customer

Located in Danville, Pennsylvania, Octane Workholding has a long history spanning back to 40 years. This family business started in the 1980s, welding farm equipment and doing general repairs. As time went on, Octane Workholding began shifting toward building bespoke equipment. As the equipment became more complex, machining became a larger part of their business, starting with manual machines and working towards CNC machining. They started to realize the amount of knowledge that they would need to learn to master CNC machining. After machining thousands of parts and gaining experience, they learned what tools were needed to succeed as Machinists and started their journey. They developed value-added products for their own use that are now available for everyone and provide educational materials that are aimed at lessening the steep learning curve of this trade.

Octane Workholding has dedicated years to mastering their CNC abilities. We were able to get in touch with Derek Pulsifer, President of Octane Workholding, to discuss how they got started, current business, and so much more!

How did you get started with Octane Workholding?

Basically, I grew up in our family shop but did not start working full time until after college. Things were heavily fabrication-oriented with only a few manual machines. After a few years running manuals myself, it was decided we would go the CNC route. Teaching myself to be a Machinist was often a struggle with no formal training or peers to reference. Being a family machine shop and working alongside Octane Sr., it could be a lot like an episode of Orange County Choppers. Most of what I share today was learned through thousands of hours of researching and learning the hard way. 

How did you get from welding farm equipment and doing repairs, to manufacturing workholding setups?

Like many things in life, things progressed and customers’ needs shifted. Our fabrication shop has built a lot of equipment for the food, pharmaceutical, and power generation industries for several years. As we gained more customers, things slowly shifted toward more job shop-oriented work. Jobshop work is a surefire way to gain experience quickly. As a Machinist, there were many times I went in search of a solution for common problems we faced. After finding solutions that didn’t fit us, I designed the products we now make today. Thousands of unique parts and decades of experience later, we knew what shops like us were probably encountering as well. Octane Workholding was created to provide solutions to common machining problems. We continue to offer quote-based work to customers through our machine shop in addition to Octane Workholding. We are Craftsmen.

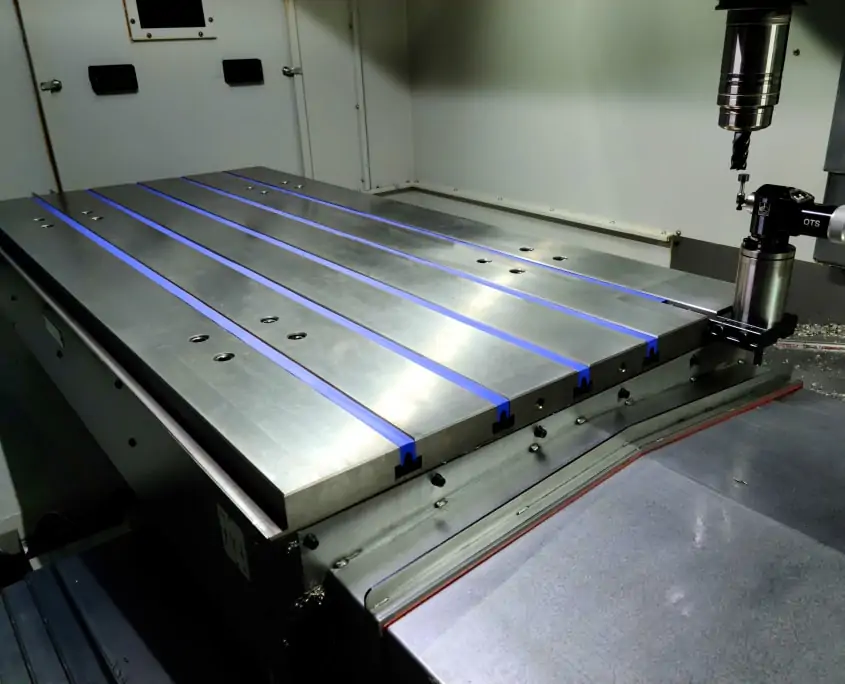
What machines do you currently have in your shop?

We have several manual machines from the classic 1960’s Bridgeport to heavy-duty Cat50 verticals. The machine I actually began on is an old South Bend lathe. Production sawing, Roll Grooving, Shears, Press Brakes, Waterjet Cutting, Welding, and Rolling machines. We also have various new CNC machinery from lathes to verticals. 

What CAM/CAD softwares do you currently use?

I program with both Mastercam and Solidworks. We use Autocad products for 2D applications like Waterjet Cutting. The advent of Fusion 360 has really benefited the industry by bringing affordable software to everyone. I would like to experiment with more CAD/CAM systems to help those who come to us with specific programming questions related to Fusion 360 etc.

What materials are you most often working with?

We primarily work with stainless steel, but no material is too difficult to work with. Materials and SFM are a bit like speed limits on the road, Hastelloy is like a 25 MPH zone, and Aluminum is like the Autobahn. Superalloys require patience and the right recipe.

What sets Octane Workholding apart from the rest of the competition?

I think people appreciate honest companies that actually engage with their customers.  Treating every customer with the same respect, no matter the size of their company. Social media has made helping anyone that needs it, a message away. Whether individuals buy our products or not, we believe the whole industry benefits from the freely available educational materials.

Can you talk about the coolest/most interesting project you have worked on?

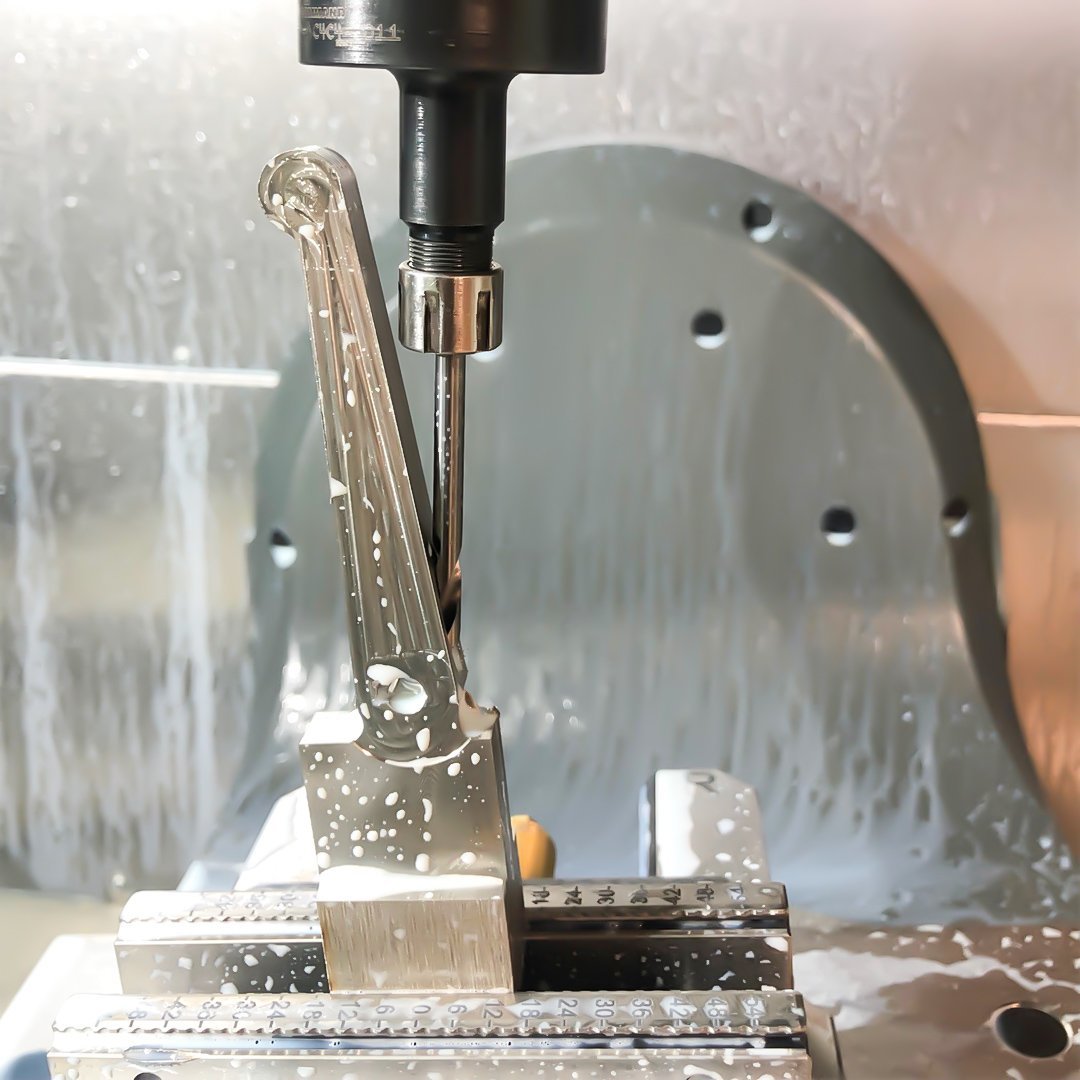
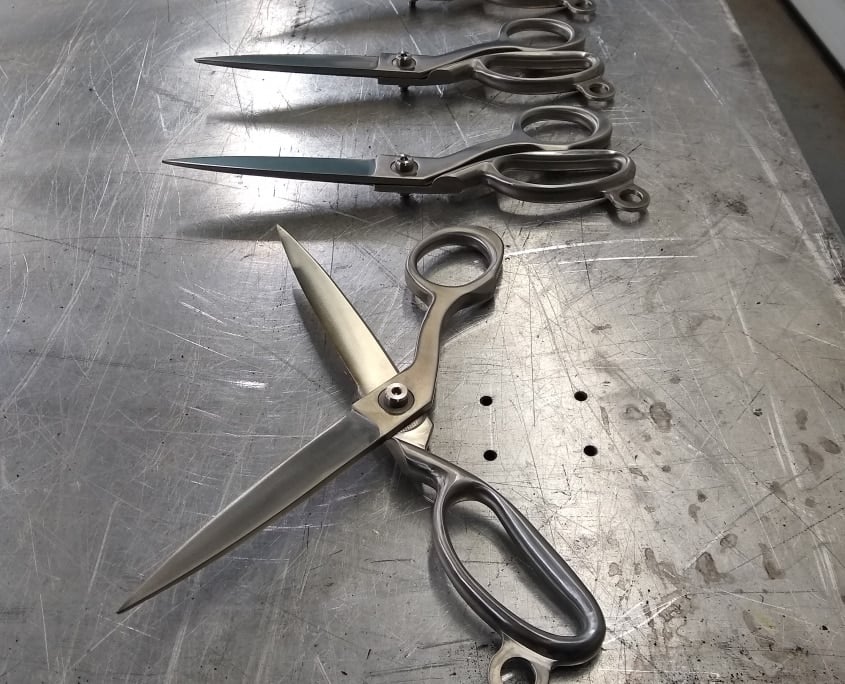
We do a lot of neat work but one project especially was great to work on. It is also one of the few that can be made public. Making 11.00″ Custom Scissors for the first time. These Scissors quickly became an obsession once work began on them. Programming them was the first step. Machining them without creating time-consuming custom fixtures was the next challenge. Once they were machined the real fun began.

Having never made Scissors or Knives professionally, I knew the next part would be a learning experience. After ordering some fine grit belts for our sanders, the polishing and sharpening had begun. To begin, I went about polishing the handles and rough sharpening to establish a reference edge on the blades.

Having some paper on hand it was time to give them a try. Success, they cut paper! Now for the real test, they were being created to cut plastic bags. Dread started to creep in as the first cut simply folded the bag in half. This was not good. Ok, what is wrong here? These feel razor-sharp, but they are paperweights at this point. Back to the drawing board. After doing some research on the great UK makers continuing this art, a hollow grind seemed like the solution.

What do we have that can do a hollow grind? A small wheel will put a deep radius if brought back to the blade. I have to make a large wheel so the hollow grind can be shallow. I’ve got it, a faceplate adapter mounted to the Old South Bend, some sandpaper glued to the outside should work! So it began, the journey into learning to hollow grind.

After hours of making things worse and worse, I cannot bring the grind from edge to edge smoothly. Some more research and it seems the technique is to “turn the key”. Wow, it feels unnatural but it works! Finally, a successful hollow grind is performed.

Now for the real art of Scissormaking, the Putter- (fine Scissor Craftsmen which I am not) must sharpen and skillfully assemble them. The final act is to bow the blades carefully such that the edges intersect. They must meet perfectly along the length of the blade as they cross.

One more test, they cut the plastic bag as it passed right through it. This was one of the best moments in my career as a Machinist.

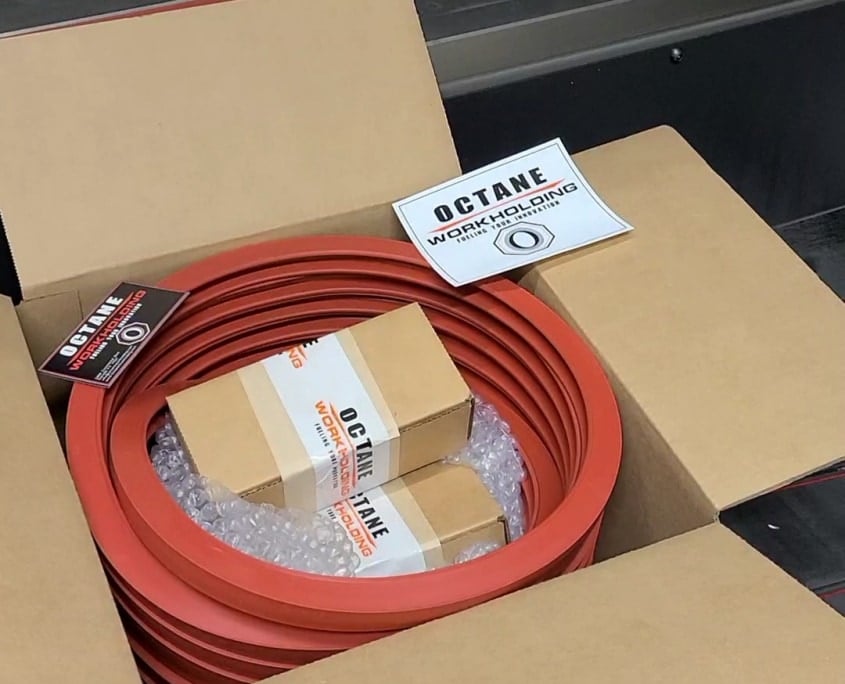
What are your current product offerings?

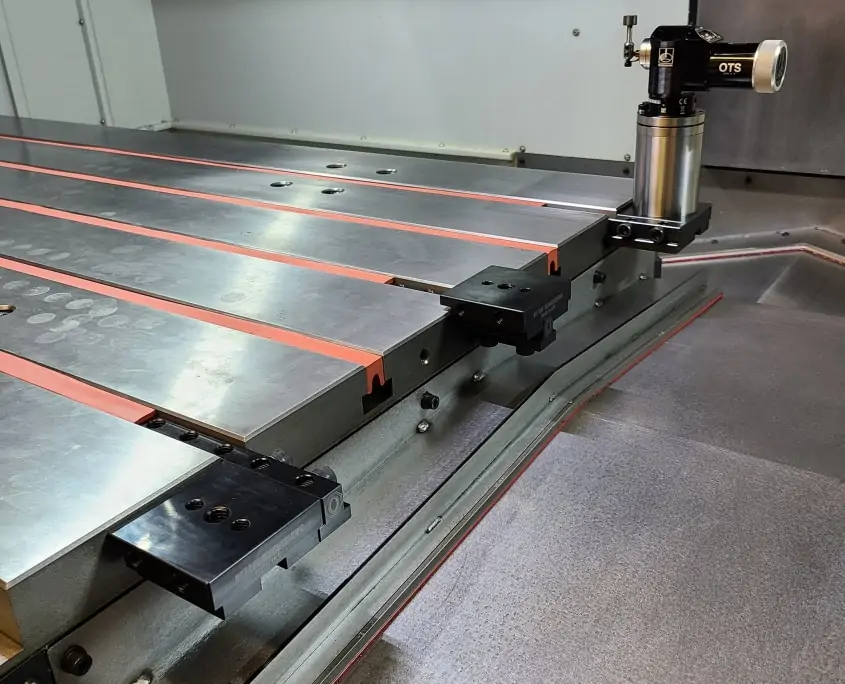
Our best-selling product is our t-slot cover, The Octane Chip Guard. We also currently offer mounts that offset your Renishaw Tool Setter. Table space is a premium for any milling machine. When the Tool Setter is outside the work envelope, additional work holding or parts can be placed. 

We also offer a T-Slot Drop in Workstop, our drop in workstops can be added at any time, even when access to the end of the t-slot is blocked. This adds a lot of flexibility to set up parts, especially if you forgot to add them beforehand (has happened more than I care to admit). There are a lot of products waiting to be released, but the demand for our t-slot covers has taken priority for now.

Having machined thousands of parts with unique setups, a product that enabled quick changeovers was essential. Cleaning a t-slot is a job Machinists have dreaded for a very long time.  Being silicone, it is extremely easy to trim a piece to fit any setup. Setting up a job for production requires only a few extra minutes to place our t-slot covers. One big problem with vertical machining centers is chip evacuation. Not only does covering the t-slot prevent chips from ever entering the groove, but it actually promotes flushing of every corner of sheet metal. Flood coolant normally is trapped within the grooves, which prevents any chance of the chips being evacuated. Unattended operation is always the goal with any CNC machine, our Chip Guard allows an operator to open the doors to a clean machine. In-process chip fans or automatic washdowns are possible. Safety is also a big issue for any shop. Most Machinists have encountered a chip ricocheting from the t-slots back at their eyes. The color options add a sleek look to any machine. We also offer black for an incognito approach.

Why is high quality tool performance important to you?

Manufacturing is all about process reliability. You may save a few dollars on a tool, but end up paying dividends when said tool fails unexpectedly. A quality tool that increases performance or extends unattended operation, is critical.

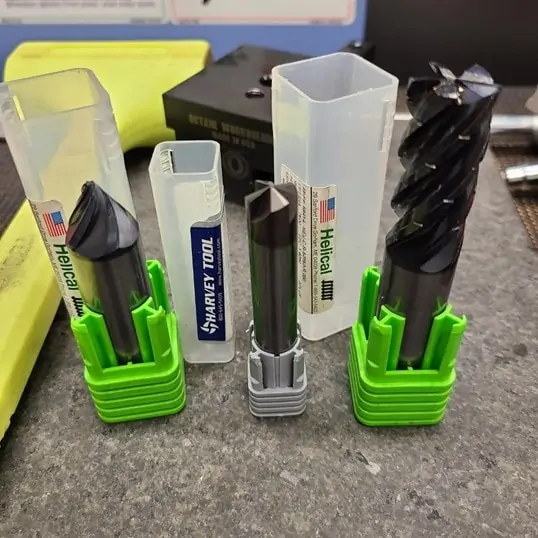
Can you talk about a time that Harvey Tool or Helical products really came through and helped you?

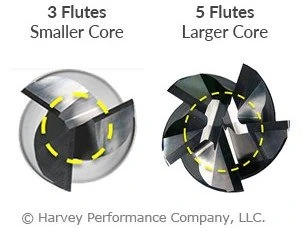
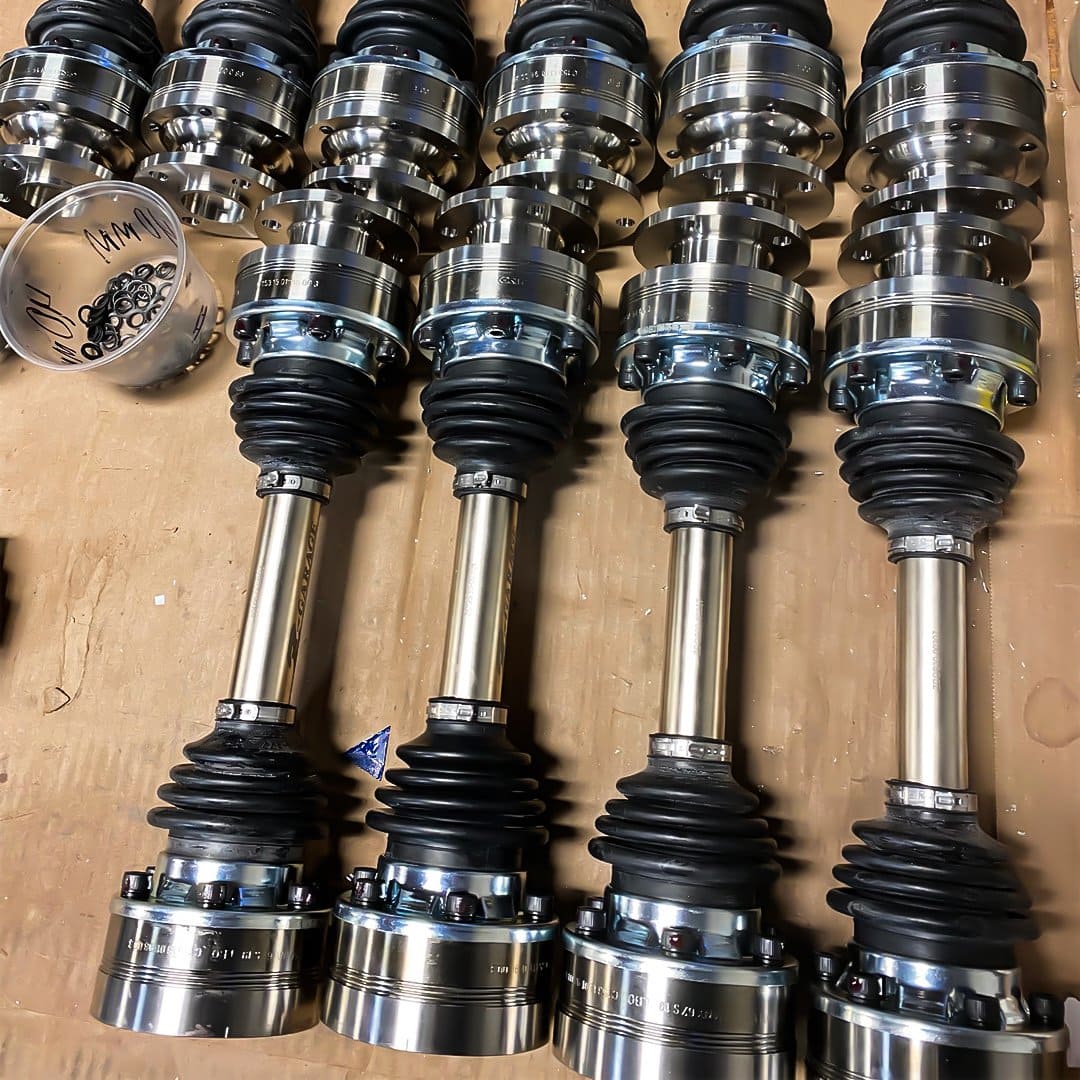
Aside from Harvey having tools available as standard, which would be a custom item for the majority of companies. We buy chamfer mills regularly for finishing bevels. The angle being accurate is paramount for finishing. If the angle is off at all, a step can be felt on the finished face. Being confident that a tool that is programmed to cut a feature is accurate, saves us a lot of time. We also rough some heavy stainless steel beveled rings. The heavy chips accumulate due to the 2.00” length of cut., so the solution to this problem was the following chipbreaker endmill – 5 FLUTE, CORNER RADIUS – CHIPBREAKER ROUGHER, VARIABLE PITCH (APLUS).  We are all familiar with the corncob style roughing endmills, which actually create chips that are too small, causing those chips to end up getting into the coolant tank. Helical chipbreaker endmills create a swarf that is the perfect size, as it fits neatly into a container for recycling. The other added benefit is tool life. The bevel rings tend to trap the swarf inside themselves, which can lead to recutting chips that were destroying tool life. The chips were able to be evacuated easily which lead to a 4x’s increase in tool life and a process we could walk away from confidently.

We noticed the education section on your website, not too many companies will add these sections, why do you feel it is important to spread knowledge?

The world saw more technological advancement in 100 years than in all recorded history through manufacturing.  While I may not be part of the next great advancement for humanity, perhaps teaching an aspiring Engineer, will lead to one. Providing the tools for brilliant individuals to go out and make an idea a reality, is something we are committed to. Future generations need to understand how critical manufacturing is to our way of life. 

If you could give one piece of advice to a new machinist ready to take the #PlungeIntoMachining, what would it be?

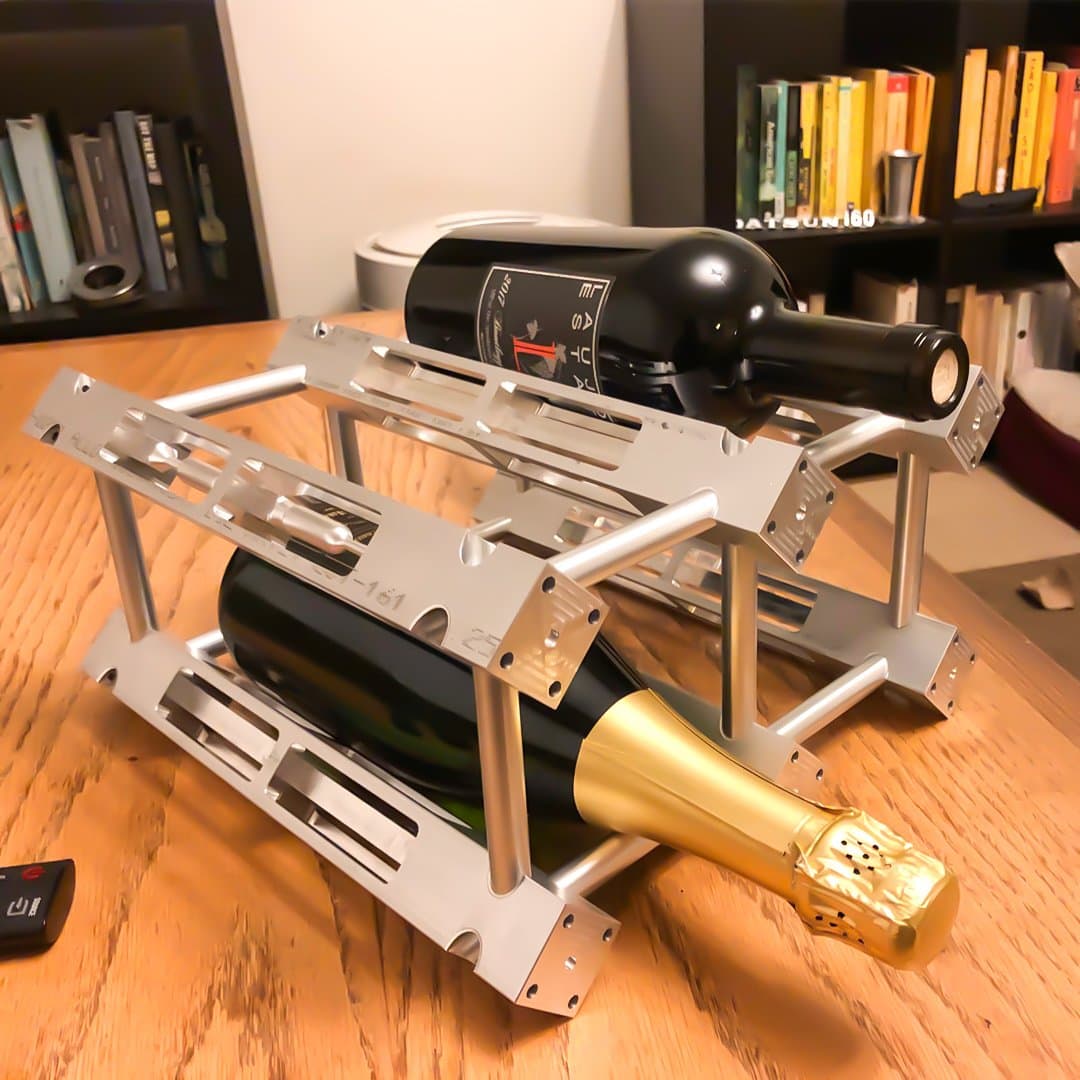
Learn cad/cam first. Watching YouTube tutorials and educational content likes ours can help accelerate the learning curve. Becoming proficient as a programmer and designer can lead to higher starting salaries. If you can walk into a shop with some knowledge of programming, you may bypass a lot of the red tape companies might present to a new employee. Machining is often the easiest part, work holding and programming are often the biggest hurdles. Not everything has been invented yet, perhaps your niche will be making ornate pens, flashlights, knives, firearm parts, etc., creative designs are always in demand. Many successful businesses started in a garage with a hobby machine. Designing your own products can lead to a booming business that can sustain your family and eventually your employees’ families. 

Is there anything else you would like to share with the In The Loupe community?

We are adding more and more educational material to our website.  It’s definitely worth bookmarking for anyone interested in learning more about this trade.

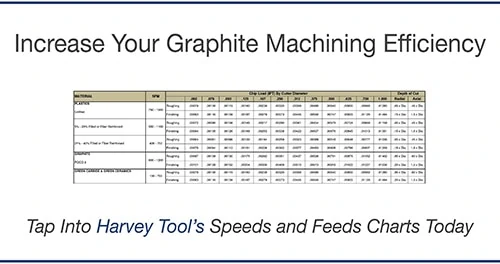
  • Speeds and feeds for turning, drilling, surface finish charts, etc.
  • Threading data like you would find in the Machinist’s handbook, but easier to find and read.
  • Educational articles on topics like quoting, lathe education, mill education etc.
  • Fun DIY projects you can make, like a tap follower.
  • Programming examples and curriculum are in progress with more information being added.

To learn more about Octane Workholding find their website here. Also, you can follow them on Instagram @octane_workholding.

Successful Slotting With Miniature Cutting Tools

Whether your tool is a 1” diameter powerhouse rougher or a .032” precision end mill, slotting is one of the hardest operations on the tool. During slotting operations, a lot of force and pressure is placed on the entire cutting edge of the tool. This results in slower speeds and feeds and increased tool wear, making it one of the nastier processes even for the best cutting tools.

With miniature tooling (for the purposes of this blog, under 1/8” diameter) the game changes. The way we approach miniature tooling is completely different as it relates to slotting. In these instances, it is vitally important to select the correct tool for these operations. A few of the suggestions may surprise you if you are used to working with larger tooling, but rest assured, these are tried and tested recommendations which will dramatically increase your success rate in miniature slotting applications.

Use as Many Flutes as Possible

When running traditional slotting toolpaths, the biggest concern with the cutting tool is getting the best chip evacuation by using the proper flute count. Traditionally speaking, you want to use the fewest amount of flutes possible. In Aluminum/Non-Ferrous jobs, this is typically no more than 2/3 flutes, and in Steel/Ferrous applications, 4 flutes is recommended. The lower flute count leaves room for the chips to evacuate so you are not re-cutting chips and clogging the flutes on your tool in deep slots.

Achieve Increased Efficiency With Miniature Tooling – Utilize Harvey Tool’s Speeds & Feeds Charts Today

When slotting with miniature tools, the biggest concerns are with tool rigidity, deflection, and core strength. With micro-slotting we are not “slotting”, but rather we are “making a slot”. In traditional slotting, we may drive a ½” tool down 2xD into the part to make a full slot, and the tool can handle it! But this technique simply isn’t possible with a smaller tool.

graphic showing difference between core sizes on 3 flute and 5 flute slotting tools

For example, let’s take a .015” end mill. If we are making a slot that is .015” deep with that tool, we are likely going to take a .001” to .002” axial depth per pass. In this case, chips are no longer your problem since it is not a traditional slotting toolpath. Rigidity and core strength are now key, which means we need to add as many flutes as possible! Even in materials like Aluminum, 4 or 5 flutes will be a much better option at smaller diameters than traditional 2/3 flute tools. By choosing a tool with a higher flute count, some end users have seen their tool life increase upwards of 50 to 100 times over tools with lower flute counts and less rigidity and strength.

Use the Strongest Corner Possible When Slotting

Outside of making sure you have a strong core on your miniature tools while making a slot, you also need to take a hard look at your corner strength. Putting a corner radius on your tooling is a great step and does improve the corner strength of the tool considerably over a square profile tool. However, if we want the strongest tip geometry, using a ball nose end mill should also be considered.

A ball nose end mill will give you the strongest possible tip of the three most common profiles. The end geometry on the ball nose can almost work as a high feed end mill, allowing for faster feed rates on the light axial passes that are required for micro-slotting. The lead angle on the ball nose also allows for axial chip thinning, which will give you better tool life and allow you to decrease your cycle times.

.078" harvey tool ball nose end mill for slotting
A .078″ ball nose end mill was used for this miniature slotting operation

Finding the Right Tool for Miniature Slotting Operations

Precision and accuracy are paramount when it comes to miniature tooling, regardless of whether you are slotting, roughing, or even simply looking to make a hole in a part. With the guidelines above, it is also important to have a variety of tooling options available to cater to your specific slotting needs. Harvey Tool offers 5 flute end mills down to .015” in diameter, which are a great option for a stronger tool with a high flute count for slotting operations.

miniature .010" harvey tool end mill
Harvey Tool offers many miniature end mill options, like the .010″ long reach end mill above.

If you are looking to upgrade your corner strength, Harvey Tool also offers a wide selection of miniature end mills in corner radius and ball nose profiles, with dozens of reach, length of cut, and flute count options. Speeds and feeds information for all of these tools is also available, making your programming of these difficult toolpaths just a little bit easier.

speeds and feeds chart ad

Achieving Slotting Success: Summary

To wrap things up, there are three major items to focus on when it comes to miniature slotting: flute count, corner strength, and the depth of your axial passes.

It is vital to ensure you are using a corner radius or ball nose tool and putting as many flutes as you can on your tool when possible. This keeps the tool rigid and avoids deflection while providing superior core strength.

For your axial passes, take light passes with multiple stepdowns. Working your tool almost as a high feed end mill will make for a successful slotting operation, even at the most minuscule diameters.

KAD Models – Featured Customer

Featured Image Courtesy of KAD Models

Established in 2012, KAD Models is a small, yet steadily growing prototype machine shop, which originated in the San Francisco Bay Area and has since opened its second location in Vermont. They have been a regional leader in the advanced manufacturing space for many years, and operate in close connection with other machine shops and related businesses like turning facilities, anodizers, welders, and more. KAD Models staff is comprised of diverse occupational backgrounds (e.g. mechanic, industrial engineer, blacksmith, etc.). Further, they have invested into their local community college and technical training programs to support an expanding talent pipeline for advanced manufacturing.

Brian Kippen is the owner & founder of KAD Models & Prototypes, Inc. Before launching KAD with model maker John Dove, Brian worked as the Director of Operations at A&J Product Solutions and a machinist at Performance Structures. Brian is drawn to the challenge of making design concepts into reality, and motivated by the ever-changing landscape of machining. Brian took time to speak with us about KAD Models, his experiences, machining techniques, and so much more.

KAD Models cnc machining a custom part
Photo Courtesy of: KAD Models

Can you give us a little background on how KAD Models was started?

I worked for a few years repairing automobiles, then following high school, I attended college for about three weeks. After some strong encouragement from my mom, I moved out west. I joined the Marines, broke both of my feet, and was honorably discharged. Then, I got my broken foot in the door at a machine shop and knew what I wanted to be when I grew up. After years of working as a machinist, I went into business with one of my previous employers. After a year and a half, the partnership degraded and I made the decision to buy out my partner.

It’s been really gratifying to see the business grow and get to know different types of customers as the shop’s reputation spreads. One of the reasons I wanted to start my own shop is that I really wanted to see the industry evolve in a new way, to better meet people’s needs. It’s been really great to see that decision and the investments I’ve made in building KAD pay off.

We produce approximately $1.5M of parts for 100+ distinct clients each year.  Since its founding in 2012, KAD has continued on a steady path of growth, adding staff, equipment, and clients without marketing or advertising. We build a broad range of products such as automotive drive axles, silicone cardiovascular valves, and fully functional consumer product models. Due to the nature of prototyping, no component is outside of the realm of possibility. 

What machines are currently in your shop?

We use Haas CNC machines. At our West coast facility, we have six machines, five vertical 4 AXIS machining centers with capacities up to 26” Y AND 50” X and one 5 AXIS universal machining center. At our East coast facility, we currently have two new CNC ONE 3 AXIS and one 5 AXIS universal machining center paired with a Trinity Automation AX5 robotic cell. I decided to get a 5 axis milling machine earlier last year because I felt we should invest before the absolute necessity arose. I’m excited about the creative options it opened up and it’s been fun to put it to good use. We are currently using both Fusion 360 and Surfcam software.

What sets KAD Models apart from the competition?

Our quick turnaround time of 3-5 days with our ability to tackle very complex parts sets KAD apart from a majority of manufacturers.

I also think our willingness to really dig in with the client and get to know what they need and why. We have a really creative team here at KAD and thrive at not only building complex parts, but helping industrial designers and engineers think through manufacturing, design, and usage requirements to build the simplest, most effective product we can. I’ve created prototypes before, just from a conversation with someone – not even a CAD drawing. It’s these types of interesting challenges that made me want to be a machinist in the first place and that keeps me engaged and excited day-to-day.

end mill machining metal
Photo Courtesy of: KAD Models

KAD Models is an innovative company. Can you speak about what innovations KAD makes?

Well, KAD works with some of the most innovative companies out there, across all kinds of industries: medical devices, aerospace, automotive, and consumer electronics. We help people at the forefront of innovation bring their ideas to life, so I’d say innovation is basically our bread and butter. As far as our innovations in process, as I said before, KAD has a really creative team. Since we are well known for prototyping and since prototype manufacturing need not follow all the common work holding rules, we break them on a daily basis.

What is your favorite part of your job?

I love the challenge of taking on seemingly impossible ideas and turning them into tangible things. I’m really satisfied when I can come home after a long day and have held the things I’ve made in my hands. I’m also really proud to be a business owner. It’s incredibly rewarding to see a team you’ve taught and grown to take on and be inspired by the same types of problems as you. It’s been really cool to see what we’ve been able to accomplish for our clients. My personal passion remains automotive.  KAD has reverse-engineered many no longer available automobile components and designed parts that upgrade vintage Datsuns.

assortment of prototype parts made by Kad Models
Photo Courtesy of: KAD Models

Why is high-quality tooling important to you?

In prototyping, you often get one chance in order to make deadlines. High quality and high-performance tools allow you to get this done without question. Given 95% of our tooling is either Helical or Harvey, I would say that high-quality tooling helps us out on a daily basis. We also use High Efficiency Milling (HEM) techniques, which Helical is optimized for. We find with long cutters and with deep pockets, HEM is almost a must.  Often though, on shallow areas, it’s overkill.  As with salt, there can be too much. 

cnc machined metal wine rack
Photo Courtesy of: KAD Models

If you could give one piece of advice to a new machinist what would it be?

Fail fast and fail often. Then learn from your mistakes. 

I think the biggest thing is getting to know other machinists, learning other methods, and being open to alternative ideas. It’s important to keep your mind open because there’s always more than one way to machine something. One of the things I’ve found most rewarding about running my own shop is getting to set the tone of how we work with other shops and adjacent industries. I’m really passionate about the manufacturing community as a whole and I’m glad blogs like this exist to help draw connections amongst us.

Also, don’t be afraid to challenge the status quo. I love working with new machinists because they bring different ideas to the table. That’s really important for innovation and to keep us all moving forward.

Feel free to check them out at www.kadmodels.com or on Instagram @kadmodels or stop by their west coast shop in California or new east coast location in Vermont.

Grappling With Graphite: A Machining Guide

Despite being a softer material, graphite is actually one of the most difficult materials to machine. There are many considerations machinists need to make in terms of tooling, coolant use, and personal safety when it comes to machining these parts. This “In The Loupe” post will examine the material properties, key machining techniques to consider, and tips for properly selecting cutting tools to achieve success in this tricky material.

graphite machining efficiency speeds and feeds chart

What is Graphite?

While graphite is an allotrope of carbon, the two terms are not simply interchangeable. Carbon is an element that can form into several different allotropes including graphite, diamond, and fullerite. Graphite happens to be the most stable form of carbon, and is the most common, as carbon naturally occurs as graphite under standard conditions.

Graphite is most recognized for its superior conductivity and resistance to high heat and corrosion. This makes it a common material in high heat, high-pressure situations in the aerospace, electrode, nuclear, energy, and military industries.

zoomed in image of graphite cnc material

Even though graphite can handle intense high-pressure situations with ease, it is actually a very soft, abrasive, and brittle material. This can cause serious challenges when machining, as graphite can eat up cutting tools, and severely minimize a tool’s usable life. However, with the proper tooling and techniques, there are ways to optimize graphite machining to be more cost-effective than the competition.

Graphite Machining Techniques

Since graphite is such a soft and brittle material, special consideration needs to be made when machining to avoid chipping it. To get a good cut, it is recommended that you take light chip loads and use lower feed rates in graphite. If you were to take a heavy cut at a fast feed rate, you would start chipping the graphite and could cause it to fracture completely. To give a comparison point, chip loads for graphite are similar to those for Aluminum materials, but with less than half the feed rate.

To give you an idea of speeds and feeds for graphite, here is an example using a 1/4″ Harvey Tool CVD Diamond Coated, 4 flute Square End Mill. If that tool was running at a standard RPM of 12,000 at 780 SFM, the recommended chip load would be .00292 for a feed rate of 140 IPM.

electrode machining

In terms of machine setup, the one major tip to remember is to always avoid using coolant. Graphite is a fairly porous material, and so it can absorb coolant and act as a “coolant sponge,” which will cause problems with finished parts. Inside the machine and on the tooling, the coolant can actually react with the graphite dust and create an abrasive slurry, which will cause problems while machining. A vacuum system is recommended for clearing material while machining graphite. Otherwise, coated tools should be able to run dry.

Another thing to note when machining graphite is that because graphite does not produce chips, but rather a cloud of very abrasive dust, it can be harmful to operators and machines without proper care. Operators should be wearing a protective mask to avoid inhaling the graphite dust. Proper ventilation and maintaining air quality in the shop is also key for the protection of machinists when working in graphite.

Since the graphite dust is also extremely conductive, it can easily damage non-protective circuits inside your CNC machine, which can cause major electrical issues. While coolant is not recommended, a vacuum system can help to remove the dust, keeping it from accumulating too much inside the machine and preventing serious problems.

Increase Your Graphite Machining Efficiency – Tap Into Harvey Tool’s Speeds and Feeds Charts Today

Cutting Tools for Graphite Machining

As previously mentioned, graphite is a notorious cutting tool-killer due to its extremely abrasive nature. Even the highest quality carbide end mills, if left uncoated, will wear quickly on most jobs. This extreme wear may force a tool change during an operation, which could lead to an imperfection in the part when trying to restart the operation where the worn tool left off.

graphite cutting tools

When selecting a cutting tool for graphite machining, the coating and cutting edge is the most important consideration. Flute count, helix angles, and other key features of the tool geometry ultimately come second to the coating when purchasing tooling.

For graphite machining, a CVD (Chemical Vapor Deposition) diamond coating is recommended whenever possible to maximize tool life and tool performance. These coatings are grown directly into the carbide end mill, improving the hardness and leaving the tool with a coating layer that is 5 times thicker than a PVD Diamond Coating. While not the sharpest edge, the CVD diamond coating provides much longer tool life than other diamond coatings due to the thicker diamond layer.

cvd diamond layer coating drawing to portray increased wear resistance

Even though initial tooling costs may be higher with CVD coated tools versus uncoated tools, since CVD coated tools see considerably longer tool life than uncoated tools, this makes the cost per part shrink significantly. In difficult, abrasive materials like graphite, the uncoated carbide tool will last a short time before the abrasiveness of the graphite completely wears down the cutting edge. Having a CVD coated tool will give you a leg up over the competition, keep your machine running with less downtime for tool changes, and ultimately deliver substantial cost savings.

cvd diamond coated harvey tool end mill for graphite
CVD Diamond Coated End Mill from Harvey Tool

Overall, graphite can be a difficult material to machine, but with the right cutting tools and proper speeds and feeds you will be making quality parts in no time. Harvey Tool offers a wide selection of CVD coated end mills in various diameters, reaches, and lengths of cut to ensure you have what you need for any job that comes your way.

New Dublin Ship Fittings – Featured Customer

Featured Image Courtesy of Lucas Gilbert, New Dublin Ship Fittings

New Dublin Ship Fittings was established in 2017 by Lucas Gilbert, and is located on the scenic south shore of Nova Scotia, Canada.  Lucas began his career with a formal education in machining and mechanical engineering. In the early 2000’s, Lucas got into the traditional shipbuilding industry made famous in the region he grew up in, Lunenburg County, Nova Scotia. It is then when Lucas identified the need for quality marine hardware and began making fittings in his free time. After some time, Lucas was able to start New Dublin Ship Fittings and pursue his lifelong dream of opening a machine shop and producing custom yacht hardware.

Lucas was our grand prize winner in the #MadeWithMicro100 Video Contest! He received the $1,000 Amazon gift card, a Micro-Quik™ Quick Change System with some tooling, and a chance to be In the Loupe’s Featured Customer for February. Lucas was able to take some time out of his busy schedule to discuss his shop, how he got started in machining, and the unique products he manufactures.

How did you start New Dublin Ship Fittings?

I went to school for machine shop and then mechanical engineering, only to end up working as a boat builder for 15 years. It was during my time as a boat builder that I started making hardware in my free time for projects we were working on. Eventually, that grew into full-time work. Right now, we manufacture custom silicon bronze and stainless fittings only. Eventually, we will move into a bronze hardware product line.

New Dublin Ship Fittings shop

Photo Courtesy of: New Dublin Ship Fittings

Where did your passion for marine hardware come from?

I’ve always loved metalworking. I grew up playing in my father’s knife shop, so when I got into wooden boats, it was only a matter of time before I started making small bits of hardware. Before hardware, I would play around making woodworking tools such as chisels, hand planes, spokeshaves, etc.

What can be found in your shop?

The shop has a 13”x 30” and 16”x 60” manual lathe, a Bridgeport Milling Machine, Burgmaster Turret Drill Press, Gang Drill, Bandsaw, 30-ton hydraulic press, #2 Hossfeld Bender, GTAW, and GMAW Welding Machines, as well as a full foundry set up with 90 pounds of bronze pour capacity. We generally only work in 655 silicon bronze and 316 stainless steel.

cnc machined boat parts

Photo Courtesy of: New Dublin Ship Fittings

What projects have you worked on at New Dublin Ship Fittings that stand out to you?

I’ve been lucky to work on several amazing projects over the years. Two that stand out are a 48’ Motorsailer Ketch built by Tern Boatworks, as well as the 63’ Fusion Schooner Farfarer, built by Covey Island Boatworks. Both boats we built most of the bronze deck hardware for.

cnc milled boat cleat

Photo Courtesy of: New Dublin Ship Fittings

I’ve made many interesting fittings over the years. I prefer to work with bronze, so I generally have the most fun working on those. I’m generally the most interested when the part is very
challenging to make and custom work parts are often very challenging. I’m asked to build or machine a component that was originally built in a factory and is difficult to reproduce with limited machinery and tooling, but I enjoy figuring out how to make it work.

Why is high-quality tooling important to you?

When I first started I would buy cheaper tooling to “get by” but the longer I did it, the more I realized that cheaper tooling doesn’t pay off. If you want to do quality work in a timely fashion, you need to invest in good tooling.

What Micro 100 Tools are you currently using?

Currently, we just have the Micro 100 brazed on tooling but we have been trying to move more into inserts so we are going to try out Micro’s indexable tooling line. After receiving the Micro-Quik™ Quick Change System, we are looking forward to trying out more of what (Micro 100) has to offer. This new system should help us reduce tool change time, saving us some money in the long run.

cnc machined rigging

Photo Courtesy of: New Dublin Ship Fittings

What makes New Dublin Ship Fittings stand out from the competition?

I think the real value I can offer boat builders and owners over a standard job shop is my experience with building boats. I understand how the fitting will be used and can offer suggestions as to how to improve the design.

If you could give one piece of advice to a new machinist what would it be?

The advice I would give to new machinists is to start slow and learn the machines and techniques before you try to make parts quickly. There is a lot of pressure in shops to make parts as fast as possible, but you’ll never be as fast as you can be if you don’t learn the processes properly first. Also, learn to sharpen drill bits well!

5 Things to Know About Helical’s High Feed End Mills

Helical Solutions‘ High Feed End Mills provide many opportunities for machinists, and feature a special end profile to increase machining efficiencies. A High Feed End Mill is a High Efficiency Milling (HEM) style tool with specialized end geometry that utilizes chip thinning, allowing for drastically increased feed rates in certain applications. While standard end mills have square, corner radius, or ball profiles, this Helical tool has a specialized, very specific design that takes advantage of chip thinning, resulting in a tool that can be pushed harder than a traditional end mill.

helical solutions high feed end mills ad with both solid round and coolant through options

Below are 5 things that all machinists should know about this exciting Helical Solutions product offering.

1. They excel in applications with light axial depths of cut

A High Feed End Mill is designed to take a large radial depth of cut (65% to 100% of the cutter diameter) with a small axial depth of cut (2.5% to 5% diameter) depending on the application. This makes them perfect for face milling, roughing, slotting, deep pocketing, and 3D milling. Where HEM toolpaths involve light radial depths of cut and heavy axial depths of cut, these utilize high radial depths of cut and smaller axial depths of cut.

2. This tool reduces radial cutting forces

The end profile of this tool is designed to direct cutting forces upward along the axis of the tool and into the spindle. This reduces radial cutting forces which cause deflection, allowing for longer reach tools while reducing chatter and other issues that may otherwise lead to tool failure. The reduction of radial cutting forces makes this tool excellent for use in machines with lower horsepower, and in thin wall machining applications.

3. High Feed End Mills are rigid tools

The design and short length of cut of these end mills work in tandem with the end geometry to produce a tool with a strong core, further limiting deflection and allowing for tools with greater reach lengths.

Push Harder in HEM With Helical Solutions’ High Feed End Mills

4. They can reduce cycle times

In high RDOC, low ADOC applications, these tools can be pushed significantly faster than traditional end mills, saving time and money over the life of the tool.

5. High Feed End Mills are well suited for hard materials

The rigidity and strength of High Feed End Mills make them excellent in challenging to machine materials. Helical’s High Feed End Mills come coated with Tplus coating, which offers high hardness and extended tool life in high temp alloys and ferrous materials up to 45Rc.

In summary, these tools with specialized end geometry that utilizes chip thinning and light axial depths of cut to allow for significantly increased feed rates in face milling, slotting, roughing, deep pocket milling, and 3D milling applications. The end profile of a High Feed End Mill applies cutting forces back up into the spindle, reducing radial forces that lead to deflection in long reach applications. Combining this end geometry with a stubby length of cut results in a tool that is incredibly rigid and well suited for harder, difficult to machine materials.

High Efficiency Milling for Titanium Made Easy With Helical’s New HVTI Cutter

Titanium is a notoriously difficult material to machine, especially in aggressive toolpaths, such as those associated with High Efficiency Milling (HEM). Helical Solutions’ new line of tooling, the HVTI-6 series of end mills for titanium, is optimized specifically for this purpose, and proven to provide 20% more tool life than a competitor’s similar tool.

At face level, these new Helical end mills for titanium feature corner radius geometry, 6 flutes, and are Aplus coated for optimal tool life and increased cutting performance. But there is much more to these end mills than the typical geometry of standard 6 flute tools. The HVTI-6 was designed with a combination of a unique rake, core, and edge design that give it a leg up over standard 6 flute tools for milling titanium while cutting HEM toolpaths. Click here to watch the HVTI-6 in action!

End Mills for Titanium

The design of the HVTI-6 was the result of significant testing by the Harvey Performance Company Innovation and New Product Development teams. These teams spent many months testing tools, doing in-depth analysis on materials and tool geometry, and pushing these tools through dozens of hours in the cut at testing sites across the country.

The new HVTI-6 cutter experienced higher metal removal rates (MRR) and 20% longer tool life while performing HEM in Titanium when compared to a standard 6 flute tool offered by a Helical Solutions competitor. This type of tool life improvement will produce huge cost savings on tooling, as well as shortened cycle times and lower cost per part.

Helical HVTI Titanium

The Harvey Performance Innovation team targeted Titanium grade Ti6Al4V for their testing, which accounts for the vast majority of the Titanium being machined in North America. The test part was designed and programmed to allow for a more defined agility test of the tool, taking the tool into key geometry cutting exercises like tight corners, long straight line cuts, and rapid movement.

Many hours were spent with Lyndex-Nikken, manufacturers of high-quality rotary tables, tool holders, and machining accessories, at their Chicago headquarters. By working with the team at Lyndex-Nikken, the Harvey Performance Company team was able to test under optimal conditions with top-of-the-line tool holders, work holding, and machining centers. Lyndex was also available to provide their expert support on tool holding techniques and were an integral part of the testing process for these tools. Video of the impressive test cuts taken at the Lyndex facility can be seen below.

WATCH THE HVTI IN ACTION

In these tests, the HVTI end mills for titanium was able to run HEM toolpaths at 400 SFM and 120 IPM in Ti6Al4V, which served as the baseline for most of the testing.

While the standard 6 flute tools offered by Helical will still perform to high standards in Titanium and other hard materials (steels, exotic metals, cast iron), the HVTI-6 is a specialized, material-specific tool designed specifically for HEM toolpaths in Titanium. Advanced speeds and feeds for these new tools are already available in Machining Advisor Pro, and the complete offering is now available in the Helical CAM tool libraries for easy programming.

To learn more about the HVTI 6 Flute End Mills for Titanium, please visit the Helical Solutions website. To learn more about HEM techniques, download the HEM Guidebook for a complete guide on this advanced toolpath.

Simplify Your Cutting Tool Orders

With the launch of the new Helical Solutions website, Harvey Performance Company is proud to introduce a new way to order Helical cutting tools. Now, users of our new website are able to send a “shopping cart” of Helical tools they’re interested in directly to their distributor to place an order, or share it with a colleague. Let’s dive into the details about this functionality and learn how you can take advantage of the time savings associated with sending a “shopping cart” to your distributor for simplified ordering.

Get Started with a HelicalTool.com Account

First, you must create an account on HelicalTool.com. Having an account on the Helical website allows you to save and edit “shopping carts,” which can be sent to a distributor to place an order; choose a preferred distributor; auto-fill your information in any important forms; and to manage your shipping information.

Create Helical Account for Helical Shopping Cart

Now that you have an account, it is time to start creating your first “shopping cart.”

Creating a “Shopping Cart”

To begin creating a new shopping cart, simply click on the “My Carts” text in the top right menu. This will take you to the management portal, where you can add a new “shopping cart” by selecting “Create New Shopping Cart.”

Helical Solutions Order

Once complete, you can name your “shopping cart” anything you would like. One example might be creating a collection of tools for each of your jobs, or for different machines in the shop. In this case, we will name it “Aluminum Roughing Job.” You can create as many different “shopping carts” as you would like; they’ll never be removed from your account unless you choose to delete them, allowing you to go back to past tooling orders whenever you’d like.

Helical Solutions Website

Now that you have a “shopping cart” created, it is time to start adding tools to it!

Adding Tools to Your Helical “Shopping Cart”

There are multiple ways to add tooling to your “shopping cart,” but the easiest method is by heading to a product table. In this example, we will be adding tooling from our 3 Flute, Corner Radius – 35° Helix product line. We want to add a quantity of 5 of EDP #59033 to our “shopping cart.” To do this, simply click on the “Add To Cart” icon located in the table row next to pricing and tool descriptions. This will open up a small window where we can manage our selection. The first step will be to choose which “shopping cart” we want to add this tool to, so we will select our “Aluminum Roughing Job” collection.

Helical Online Ordering

Since this tool is offered uncoated and Zplus coated, we need to select which option we would like from the drop down menu. For this example, we will select the Zplus coated tool. Now, we simply need to update our quantity to “5”, and click “Add To Cart.” That tool will now appear in your “shopping cart” in the quantity selected.

If you need more information on a tool, you can click on an EDP number to be brought to the tool details page, where you can also add that EDP to your collection.

If you know the EDP number you need and want to check stock levels, use our Check Stock feature to check quantities on hand, and then add the tools to your “shopping cart” right from the Check Stock page.

Helical Shopping Cart checking stock

Now, it is time to send the “shopping cart” to place an order with your distributor!

Placing An Order With Your Distributor

Once you have completed adding tools to your Helical “shopping cart,” navigate back to the My Carts page to review it. From here, you can update quantities, see list pricing, and access valuable resources.

On the right side of the My Cart screen, you will see an option to “Send to Distributor.” Click on the text to expand the drop down. If you have previously added a preferred distributor from your account page and they are participating in our Shopping Cart Program, you will see their information in this area.

If you have not yet selected a preferred distributor, select “Update My Distributor.” This will bring you to a new page where you can select your state and see all participating distributors in your area. Select one distributor as your preferred distributor, and then head back to the My Cart page.

Now that you have a distributor selected, you can do a final review of the “shopping cart,” and then simply click “Send Cart.” This will send an email order directly to your distributor with all of your shipping information, your list of tools and requested quantities, and your contact information. You will also receive a copy of this email for your records.

Helical Shopping Cart Distributor

Within 1 business day, the distributor will follow up with you to confirm the order, process payment, and get the tools shipped out and on the way to your shop. No more phone calls or emails – just a single click, and your order is in the hands of our distributor partners.

To get started with this exciting new way to shop for Helical cutting tools, click here to begin creating an account on HelicalTool.com!

Axis CNC Inc. – Featured Customer

Featured Image Courtesy of Axis CNC Inc

Axis CNC Inc was founded in 2012 in Ware, Massachusetts, when Dan and Glenn Larzus, a father and son duo, decided to venture into the manufacturing industry. Axis CNC Inc has provided customers with the highest quality manufacturing, machining, and programming services since they’ve opened. They specialize in manufacturing medical equipment and have a passion for making snowmobile parts.

We sat down with Axis CNC Inc to discuss how they got started and what they have learned over there years in the manufacturing world. Watch our video below to see our full interview.

Show Us What You #MadeWithMicro100

Are you proud of the parts you #MadeWithMicro100? Show us with a video of the parts you are making, the Micro 100 Tool used, and the story behind how that part came to be, for a chance to win a $1,000 Amazon gift card grand prize!

With the recent addition of the Micro 100 brand to the Harvey Performance Company family, we want to know how you have been utilizing its expansive tooling offering. Has Micro 100’s Micro-Quik system helped you save time and money? Do you have a favorite tool that gets the job done for you every time? Has Micro 100 tooling saved you from a jam? We want to know! Send us a video on Instagram and show us what you #MadeWithMicro100!

How to Participate

Using #MadeWithMicro100 and @micro_100, tag your video of the Micro 100 tools machining your parts on Instagram or Facebook. Remember, don’t share anything that could get you in trouble! Proprietary parts and trade secrets should not be on display.

Official Contest Rules

Contest Dates:

  • The contest will run between December 5, 2019 to January 17, 2020. Submit as many entries as you’d like! Entries that are submitted before or after the contest period will not be considered for the top prizes (But we’d still like to see them!)

The Important Stuff:

  1. Take a video of your Micro 100 tool in action, clear and visible.
  2. Share your video on social media using #MadeWithMicro100 and tagging @Micro_100.
  3. Detail the story behind the project (tool number(s), operation, running parameters, etc.)

Prizes

All submissions will be considered for the $1,000 Amazon gift card grand prize. Of these entries, the most impressive (10) will be put up to popular vote. All entries put up to vote will be featured on our new customer testimonial page on our website with their name, social media account, and video displayed for everybody to see.

We’ll pick our favorites, but the final say is up to you. Public voting will begin on January 21, 2020, and a winner will be announced on January 28, 2020.

The top five entries will be sent Micro 100’s Micro-Quik tool change system with a few of our quick change tools. The top three entries will be offered a spot as a “Featured Customer” on our “In The Loupe” blog!

The Fine Print:

  • Please ensure that you have permission from both your employer and customer to post a video.
  • All entries must be the original work of the person identified in the entry.
  • No purchase necessary to enter or win. A purchase will not increase your chances of winning.
  • On January 28, 2020, the top 5 winners will be announced to the public. The Top 5 selected winners will receive a prize. The odds of being selected depend on the number of entries received. If a potential winner cannot be contacted within five (5) days after the date of first attempt, an alternative winner may be selected.
  • The potential winners will be notified via social media. Each potential winner must complete a release form granting Micro 100 full permission to publish the winner’s submitted video. If a potential winner cannot be contacted, or fails to submit the release form, the potential winner forfeits prize. Potential winners must continue to comply with all terms and conditions of these official contest rules, and winning is contingent upon fulfilling all requirements.
  • Participation in the contest constitutes entrants’ full and unconditional agreement to and acceptance of these official rules and decisions. Winning a prize is contingent upon being compliant with these official rules and fulfilling all other requirements.
  • The Micro 100 Video Contest is open to residents in US and Canada who are at least 18 years old at the time of entry.